Tuesday 6 November 2012

AD RMS Infrastructure Concepts

AD RMS infrastructure

AD RMS, like any IT service, relies on some infrastructure to work. In the case of AD RMS there are several components that work together in order for the solution to deliver a useful service. The most relevant ones are:
· AD RMS servers and clusters
· The AD RMS SQL Server database
· Active Directory
· The Rights Management Services client and RMS-enabled applications in the client
· AD RMS-integrated server applications

image

While there are other components that work along with AD RMS to make the whole thing work, those should cover the most important ones needed to understand other topics in this blog.

AD RMS Servers and Clusters

AD RMS provides its services to other elements as a web-service, and it is thus hosted inside Internet Information Services in a Windows Server. It normally runs over HTTPs (though running it over HTTP is also possible) providing a few web service operations that can be consumed by clients and services to perform information protection and consumption tasks.
AD RMS actually not only uses IIS in the hosting server, but it also uses Message Queuing to interact with the AD RMS database which we will be discussing later. That ensures that operations in the AD RMS services that need to send data to the database can be performed asynchronously and that in turn increases performance and resiliency of the database services.
Multiple AD RMS servers are typically joined together forming AD RMS clusters, which are basically collections of identically-configured AD RMS servers connected to the same AD RMS database and working together to resolve requests from other clients and servers. In an AD RMS cluster it doesn’t matter which server resolves a request, so the requests are typically load balanced through a mechanisms such as Network Load Balancing in Windows or an external load balancer.

AD RMS Database

As stated, a group of identical AD RMS servers form an AD RMS cluster. Servers in a cluster don’t host persistent service-related data in their own disks. All configurations, logs, persistent status and operation data and caches are actually hosted externally to the AD RMS servers in a SQL Server database called the AD RMS Database. That way, all servers share a common configuration and if a server fails users can continue to work through other servers in the cluster.
There’s actually not a single AD RMS database but three. Those three databases are typically hosted in the same server and are:
· The AD RMS Configuration Database, which hosts all the configurations defining the behavior of the cluster such as its URLs and caching behavior, as well as copies of some certificates and other items needed to keep the service running. It typically also holds the core certificates and keys for the AD RMS servers themselves.
· The AD RMS Caching database, which is used to cache frequently used data about the users and groups defined in Active Directory, in order to avoid impacting the performance of AD every time the service needs anything from the directory.
· The AD RMS Logging Database, in which AD RMS puts information about transactions that have been performed by the service. This information is not used by AD RMS for anything other than for reporting.

Active Directory

AD RMS uses Active Directory to authenticate users of the system within the forest where it is installed. It also uses AD to obtain information about the email address of the users, which is used as the users’ identifier thorough the system, and to obtain information about group membership when the rights assigned to a document refer to a group instead of an individual user.
As stated above, AD RMS caches data from AD in the AD RMS AD Caching database in order to avoid hitting the domain controllers too hard.

Client-side components

AD RMS typically works together with client-side components to perform the encryption, decryption and policy enforcement tasks.
The main client-side components in an AD RMS system are the Rights Management Services client and AD RMS-enabled applications.
The Rights Management Services client, which comes installed as part of Windows Vista SP1 and later and in Windows 7, and that can be installed in earlier versions of Windows, deals with all the key management, communicates with the AD RMS services in requesting licenses and providing certificates and communicates with the client applications to perform the encryption and decryption of content. It also provides a secure environment for all these tasks to occur, helping prevent tampering and potential key disclosures.
AD RMS enabled server-side applications

While most AD RMS-related operations are performed between the clients and the AD RMS servers, having some level of integration between certain server-side services and AD RMS can provide for a better user experience and more efficient IT services. For example, Exchange Server 2010 can acquire licenses for content on behalf of the users so users don’t have to wait for a license to be acquired when they open email they have in their inbox. It also provides the ability to create and consume protected content in the browser when using OWA, along with other capabilities.

How to Backup and Restore Active Directory on Server 2008

Have you ever accidentally deleted a user account or an OU in Active Directory and wished you could restore it?
I recently had a client call me after they installed updates and rebooted their server. They noticed after the reboot that there was a message that said “Active Directory is rebuilding indices. Please wait”.
Their Active Directory database had become corrupted from the updates. So what do you do? How can you restore AD?
Let’s talk about how to backup AD in Windows Server 2008 and how to restore it. Today I’ll show you:
  • what you need to do to get your Server 2008 ready for backup
  • how to backup Active Directory on Server 2008
  • how to perform an Authoritative Restore of Active Directory
  • how to perform Active Directory Snapshots

Prerequisites: Getting Server 2008 Ready for Backup

Before you can backup Server 2008 you need to install the backup features from the Server Manager.
1. To install the backup features click StartServer Manager.

How to Backup and Restore Active Directory on Server 2008 - 1
2. Next click FeaturesAdd Features


How to Backup and Restore Active Directory on Server 2008 - 2
3. Scroll to the bottom and select both the Windows Server Backup and the Command Line Tools


How to Backup and Restore Active Directory on Server 2008 - 3
4. Click Next, then click Install

Backing up Server 2008 Active Directory

Now that we have the backup features installed we need to backup Active Directory. You could do a complete server backup, but what if you need to do an authoritative restore of Active Directory?
As you’ll notice in Server 2008, there isn’t an option to backup the System State data through the normal backup utility.


How to Backup and Restore Active Directory on Server 2008 - 4
So what do we do? We need to go “command line” to backup Active Directory.
1. Open up your command prompt by clicking Start and type “cmd” and hit enter.
2. In your command prompt type “wbadmin start systemstatebackup -backuptarget:e:” and press enter.
Note: You can use a different backup target of your choosing
3. Type “y” and press enter to start the backup process.


How to Backup and Restore Active Directory on Server 2008 - 5
When the backup is finished running you should get a message that the backup completed successfully. If it did not complete properly you will need to troubleshoot.


How to Backup and Restore Active Directory on Server 2008 - 6
Now you have a system state backup of your 2008 Server!

Authoritative Restore of Active Directory

So now what if you accidentally delete an OU, group, or a user account and it’s already replicated to your other servers? We will need to perform an authoritative restore of the Active Directory object you accidentally deleted.
1. To do this you will need to boot into DSRM (Directory Services Restore Mode) by restarting your server and pressing F8 during the restart.
2.Choose Directory Services Restore Mode from the Advanced Boot menu.


How to Backup and Restore Active Directory on Server 2008 - 7
3. Login to your server with your DSRM password you created during Active Directory installation.
4. Once you’re logged into your server and in DSRM safe mode, open a command prompt by clicking Start, type “cmd“, and press enter.
5. To make sure you restore the correct backup it’s a good idea to use the “wbadmin get versions” command and write down the version you need to use.


How to Backup and Restore Active Directory on Server 2008 - 8
6. Now we need to perform a non-authoritative restore of Active Directory by typing “wbadmin start systemstaterecovery -version:04/14/2009-02:39“.
Note: The version of backup will vary depending on your situation. Type “y” and press enter to start the non authoritative restore.
7. Go grab some coffee and take a break while the restore completes.


How to Backup and Restore Active Directory on Server 2008 - 9
8. You can mark the sysvol as authoritative by adding the –authsysvol switch to the end of the wbadmin command.


How to Backup and Restore Active Directory on Server 2008 - 10
9. But if you want to restore a specific Active Directory object then you can use the ever familiar ntdsutil.
For this example we are going to restore a user account with a distinguished name of CN=Test User,CN=Users,DC=home,DC=local. So the commands would be:
ntdsutil
activate instance ntds
authoritative restore
restore object “cn=Test User,cn=Users,dc=home,dc=local”
Note: The quotes are required


How to Backup and Restore Active Directory on Server 2008 - 11
10. Reboot your server into normal mode and you’re finished. The object will be marked as authoritative and replicate to the rest of your domain.

Using Active Directory Snapshots

There is a really cool new feature in Windows Server 2008 called Active Directory Snapshots. Volume Shadow Copy Service now allows us to take a snapshot of Active Directory as a type of backup. They are very quick to create and serve as another line of defense for your backup strategy.
With your server booted into normal mode open a command prompt by clicking Start, type “cmd“, and press enter.
We are going to use the ntdsutil again for creating the Active Directory snapshots. The commands are:
ntdsutil
snapshot
activate instance ntds
create
quit
quit

How to Backup and Restore Active Directory on Server 2008 - 12
So now that you have a snapshot of AD, how do you access the data? First we need to mount the snapshot using ntdsutil. The commands are:
ntdsutl
snapshot
list all
mount 1
— (Note: You should mount the correct snapshot you need; for this example there is only 1.)
quit
quit

How to Backup and Restore Active Directory on Server 2008 - 13
Your snapshot is mounted, but how do you access the data? We need to use the dsamain command to accomplish this. Then we need to select an LDAP port to use. The command is as follows:

dsamain –dbpath c:\$SNAP_200905141444_VOLUMEC$\WINDOWS\NTDS\ntds.dit –ldapport 10001
The result should look like this:


How to Backup and Restore Active Directory on Server 2008 - 14
Now we need to go to Start, Administrative Tools, then Active Directory Users and Computers.
Right click Active Directory Users and Computers and select Change Domain Controller.


How to Backup and Restore Active Directory on Server 2008 - 15
In the area that says < Type a Directory Server name [:port] here > enter the name of your server and the LDAP port you used when running the dsamain command.
For my example it would be: WIN-V22UWGW0LU8.HOME.LOCAL:10001


How to Backup and Restore Active Directory on Server 2008 - 16
Now you can browse the snapshot of Active Directory without affecting anything else negatively.


Monday 5 November 2012

Installing Active Directory on Windows Server 2012 Core

Microsoft has indeed made installing roles and features a great ease. To install Active Directory on Serve Core 2012 we must first configure the server to promote it to a domain by using the sconfig command.


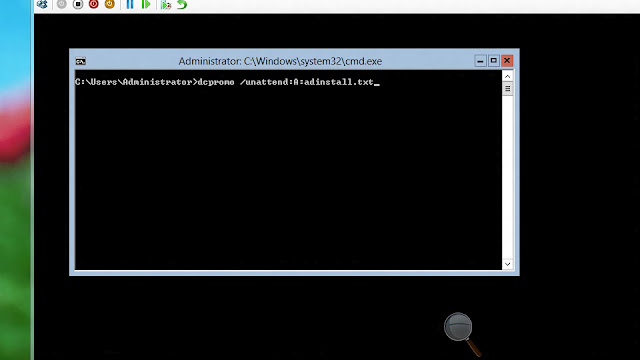
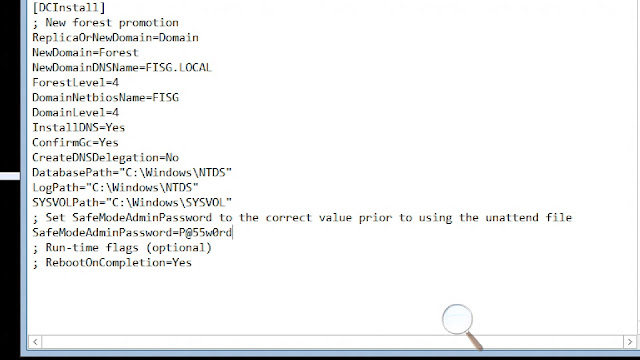
The next step is to prepare our unattended file for Active Directory.


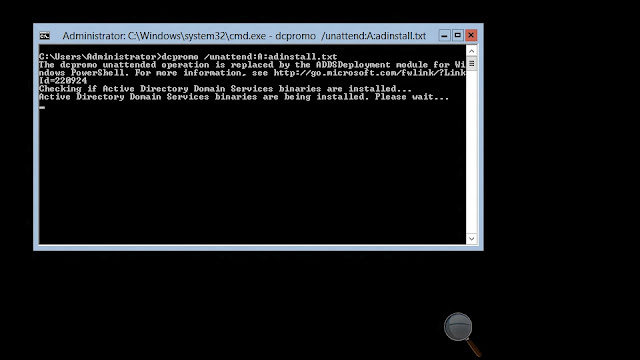
Our next step is run the unattended file to install Active Directory and DNS.


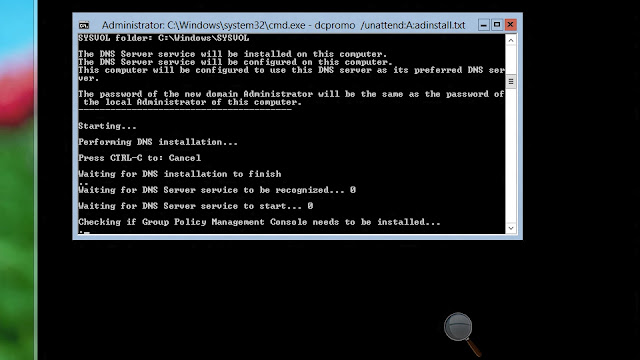
The Active Directory installation will run and install DNS.


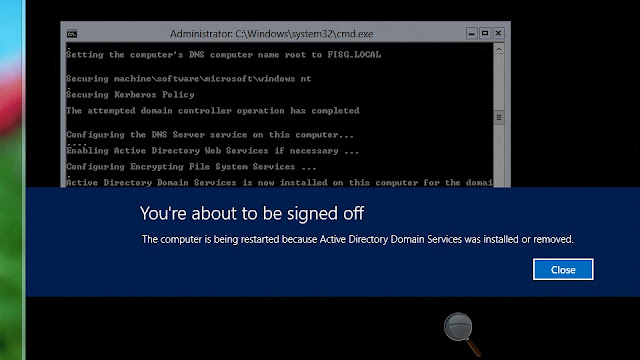
As the installation runs normal Active Directory install and securing will take place.


Once completed depending on your unattended file the system will reboot if yes was selected in your answer file.


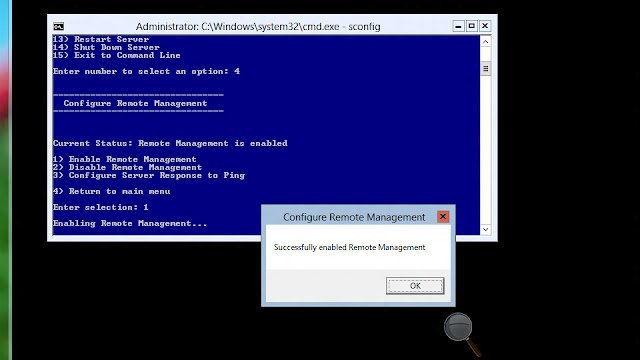
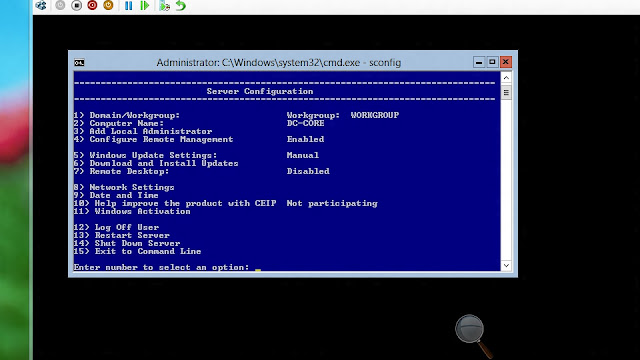
Once restarted the next step is to enable remote management to manage the Server Core from your Windows 8 Client. Using the sconfig command enter the remote management option by pressing 4 and then 1 to enable remote management.


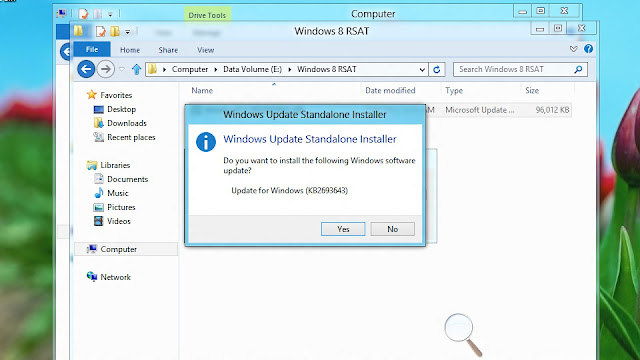
To manage Active Directory from your Windows 8 client the next step is first join the Windows 8 client to the domain then install the Remote Server and Administration Tool (RSAT) for Windows 8. RSAT for Windows can be downloaded here.


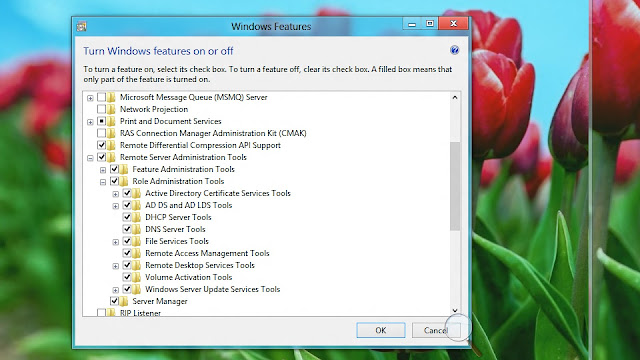
Once RSAT is installed. Depending on your network needs you can turn on and off features to manage from your Windows 8 Client. By default all RSAT features are turned on for server roles and features.


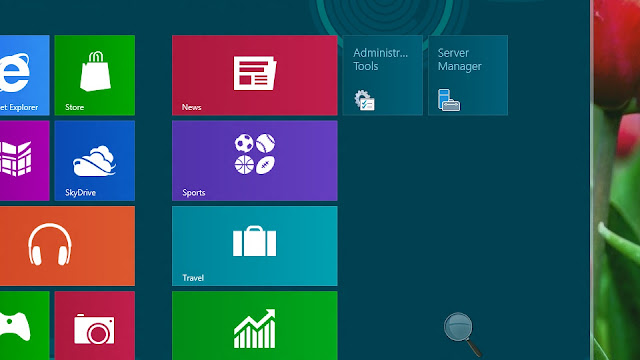
From the Metro UI you can now access Server Manager and Administrative Tools to manage your network.


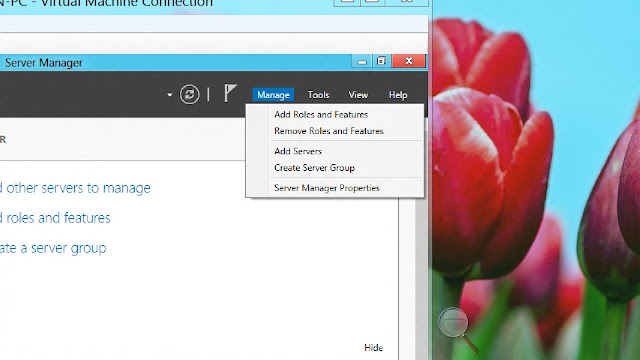
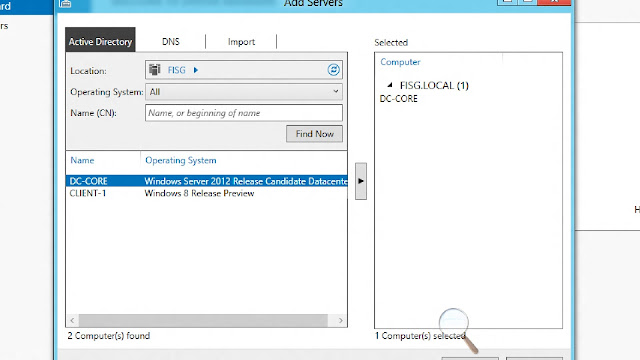
In Server Manager select manage then add the server you would like to manage.


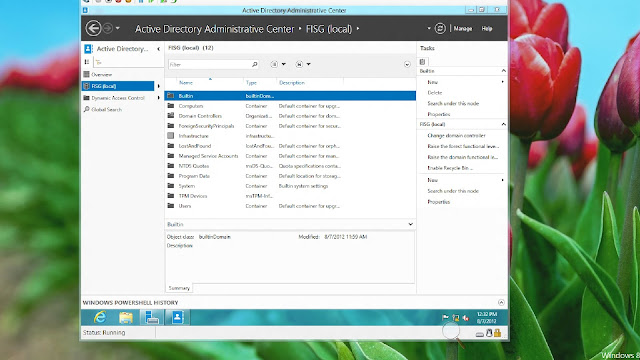
Once the server is added that you would like to manage. Select tools to choose the role or feature you would like to manage.


Now you can manage and configure Active Directory on Server Core 2012 from your Windows 8 Client.