Installing Active Directory on Windows Server 2012 Core
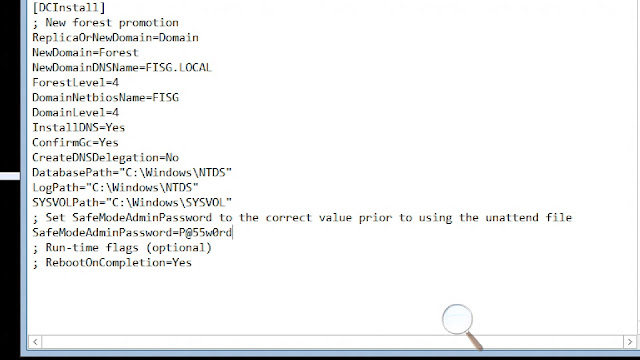
The next step is to prepare our unattended file for Active Directory.
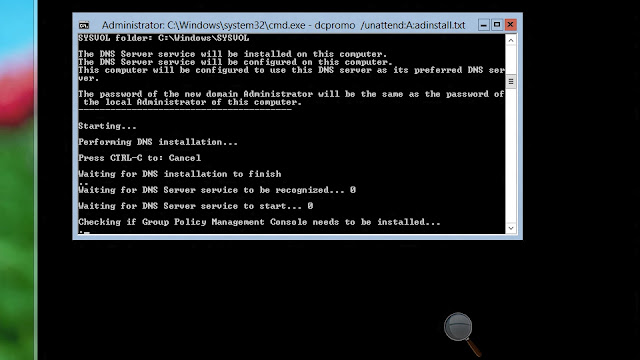
Our next step is run the unattended file to install Active Directory and DNS.
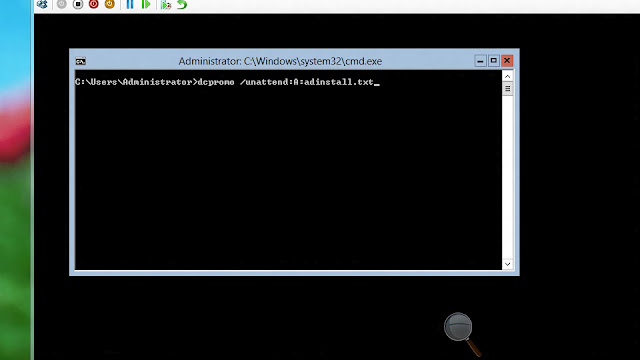
The Active Directory installation will run and install DNS.
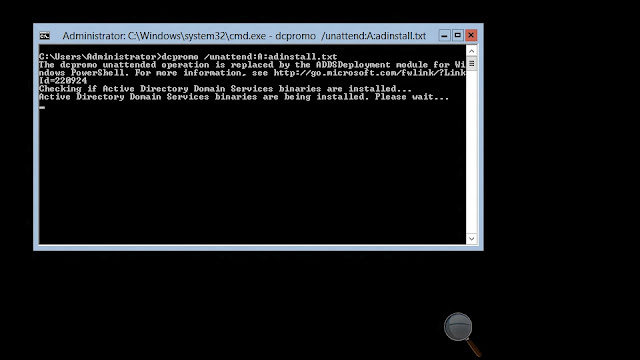
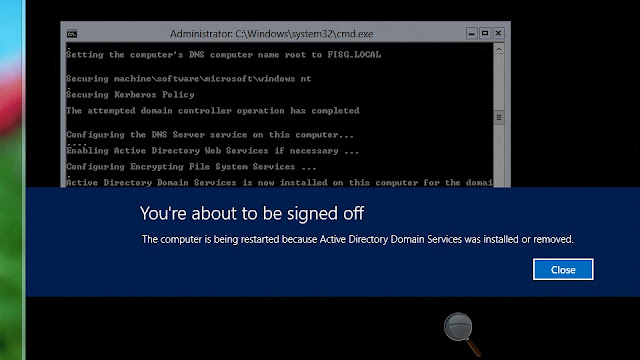
As the installation runs normal Active Directory install and securing will take place.
Once completed depending on your unattended file the system will reboot if yes was selected in your answer file.
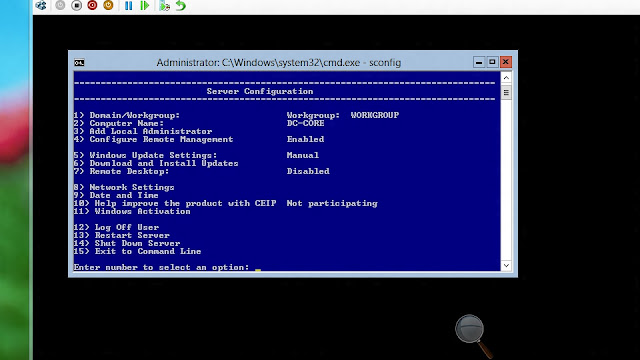
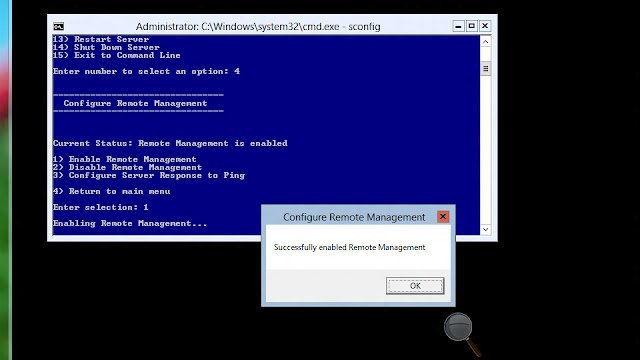
Once restarted the next step is to enable remote management to manage the Server Core from your Windows 8 Client. Using the sconfig command enter the remote management option by pressing 4 and then 1 to enable remote management.
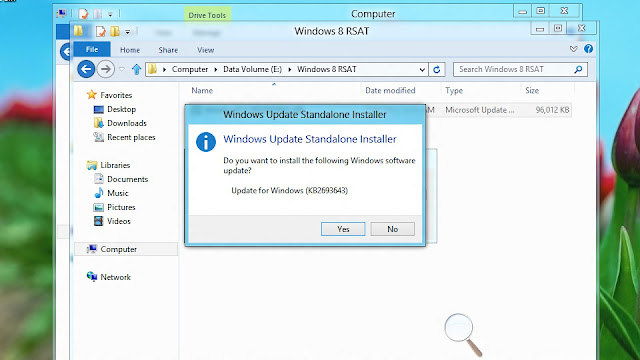
To manage Active Directory from your Windows 8 client the next step is first join the Windows 8 client to the domain then install the Remote Server and Administration Tool (RSAT) for Windows 8. RSAT for Windows can be downloaded here.
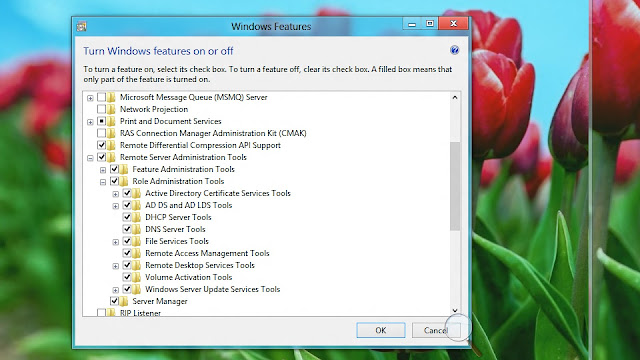
Once RSAT is installed. Depending on your network needs you can turn on and off features to manage from your Windows 8 Client. By default all RSAT features are turned on for server roles and features.
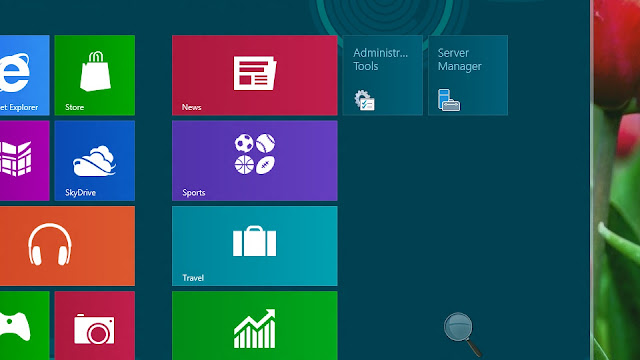
From the Metro UI you can now access Server Manager and Administrative Tools to manage your network.
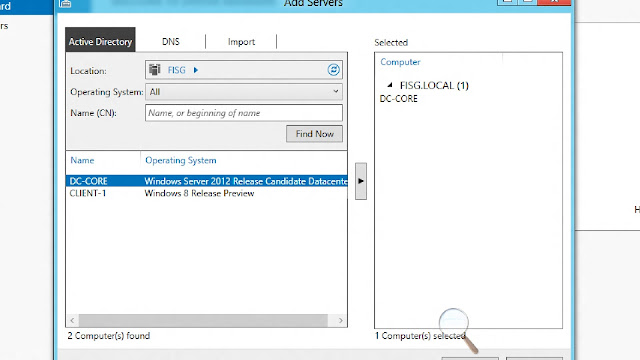
In Server Manager select manage then add the server you would like to manage.
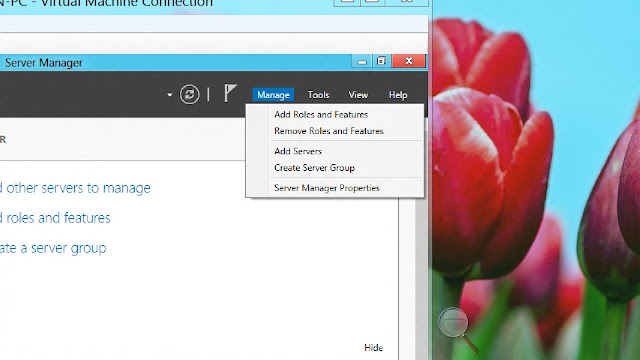
Once the server is added that you would like to manage. Select tools to choose the role or feature you would like to manage.
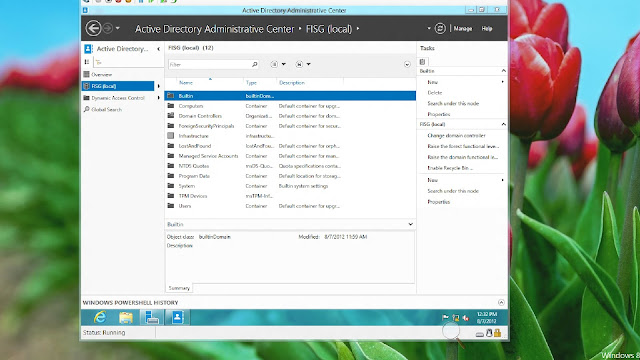
Now you can manage and configure Active Directory on Server Core 2012 from your Windows 8 Client.
No comments:
Post a Comment
Note: only a member of this blog may post a comment.